How to Repair a Broken Outboard Gearcase Skeg
The skeg of an outboard or sterndrive gear case provides much directional stability and steering ease. Whether caused by running aground or due to some land-bound calamity, a broken or damaged skeg adversely affects handling.
In some cases, a welder can repair your skeg. When I needed to repair the bent skeg of the Yamaha outboard that powers my Edgewater 228 CC charter boat, I elected to do it myself using a Megaware SkegGuard.
Made of mirror-polished stainless steel, a SkegGuard works as long as at least 3 inches of stub remain of the broken skeg. Here’s how I did it.
Skill Level: 1/5 Finish Time: 2 Hours Tools and Supplies
Megaware SkegGuard ($99.95, various sizes)
Jigsaw with bi-metal blade
3M Scotch-Brite pads (green or red)
Drill motor
Cobalt or HSS drill bit (1/4-inch)
Mallet * Mill-bastard file * Wire brush
Removing the gear case also gives you a chance to replace the water-pump impeller, housing and gasket to ensure max cooling performance. It’s relatively easy on most outboards. Check your owner’s manual and do-it-yourself videos on the Web for your brand of motor. Be sure to keep the bolts and washers that connect the lower unit to the midrange section of your outboard engine in a safe place (like a large cup) so they don’t get lost prior to reassembly.
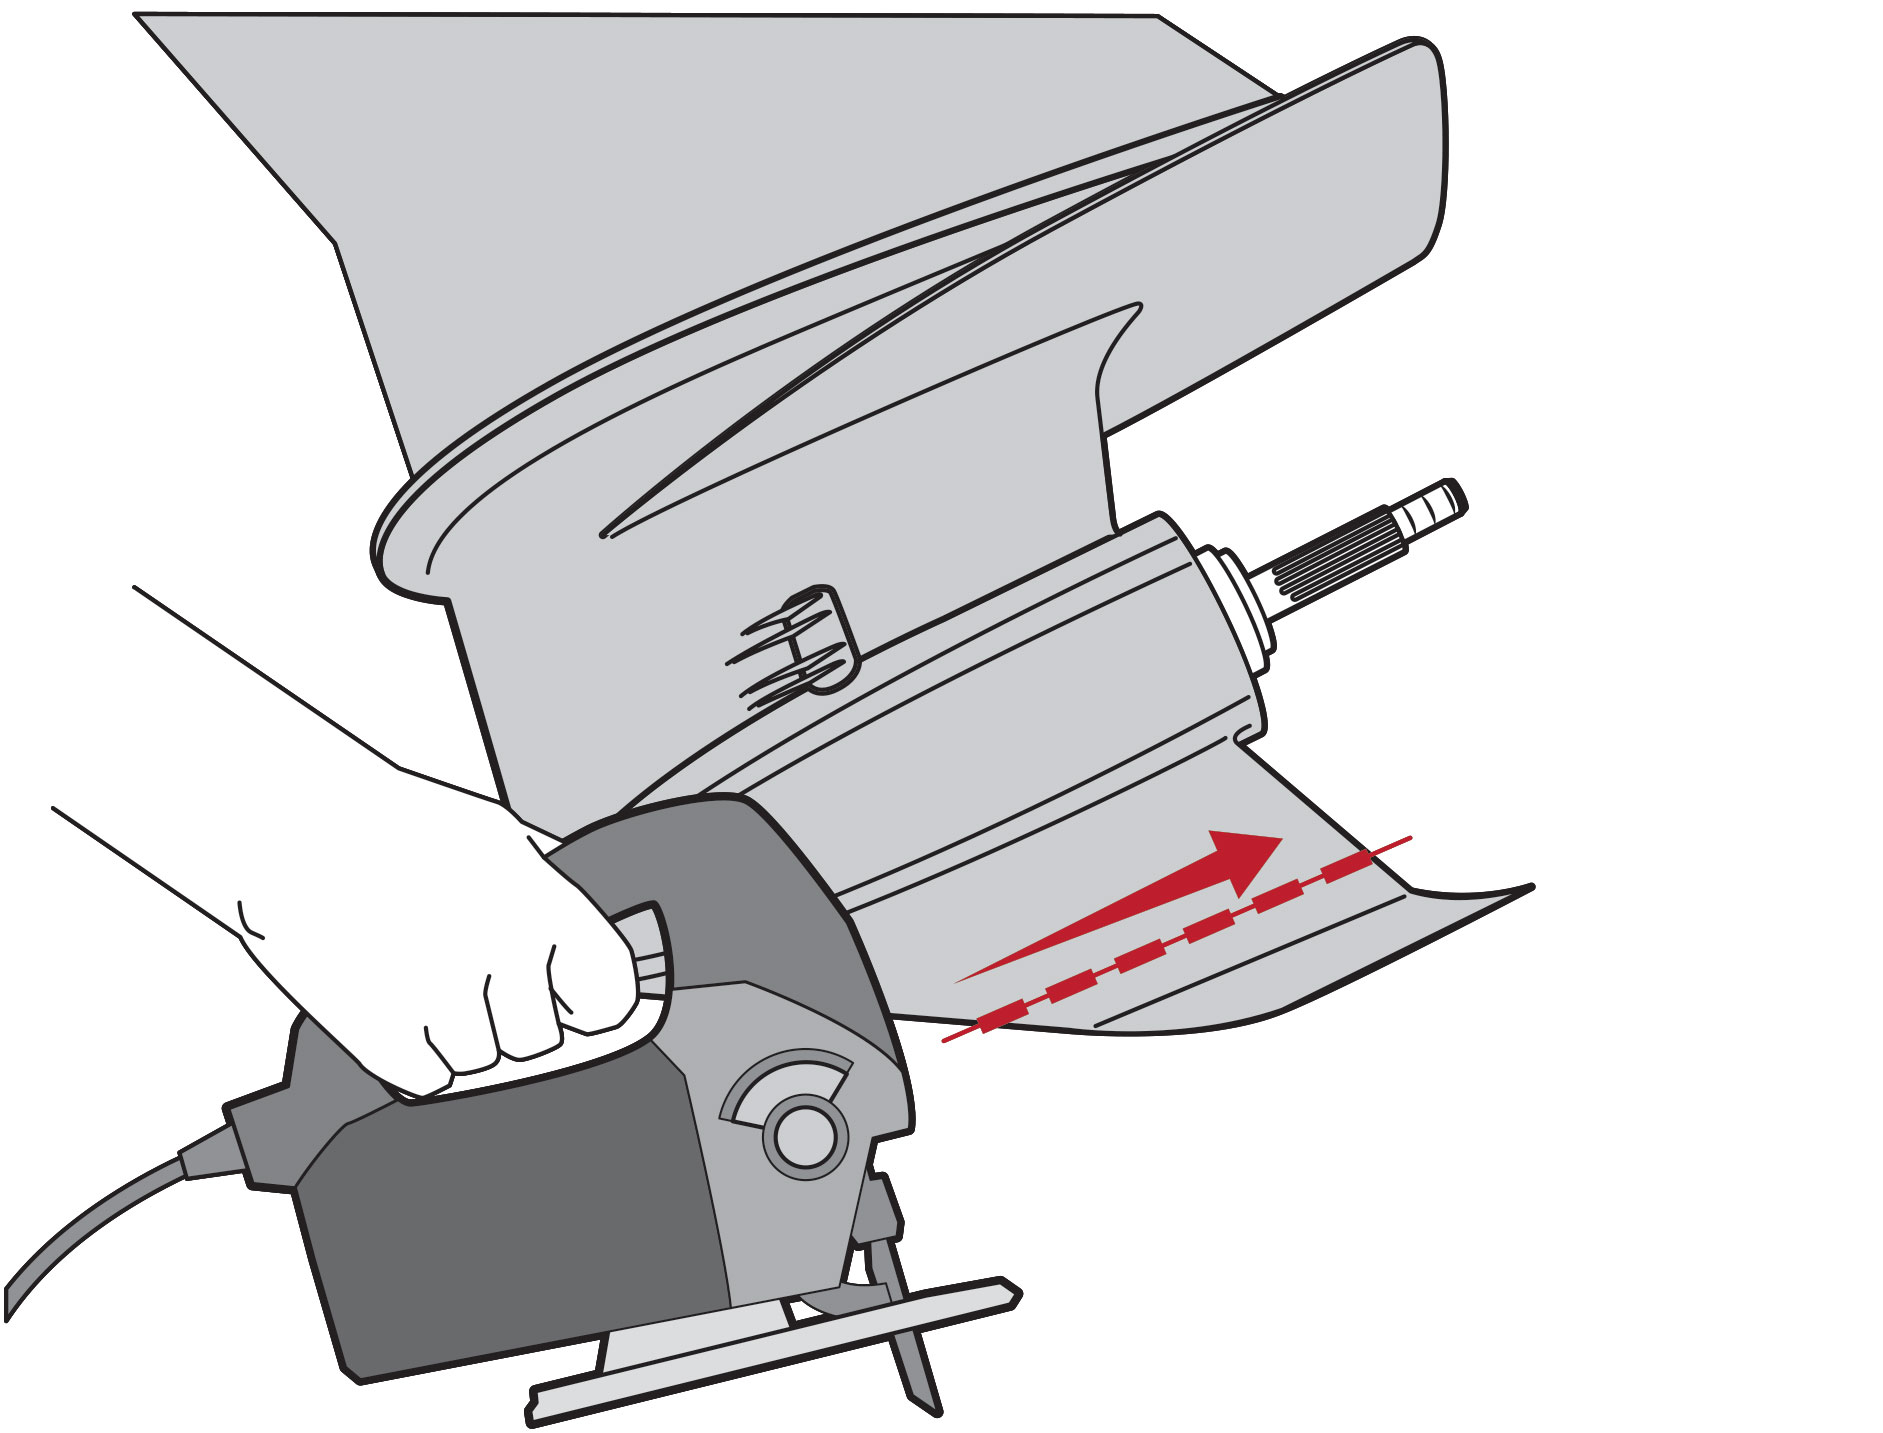
Cut Flush I used a jigsaw fitted with a bi-metal blade to cut the bent skeg off and present a clean and level surface. A SkegGuard requires at least 3 inches of stub remaining from the original skeg in order to be affixed. Don’t cut off too much.
Prep the Surface Use a mill-bastard file and/or an abrasive Scotch-Brite pad to deburr the cut edges of the outboard or sterndrive’s skeg stub. Use a stiff-wire brush to clean off metal bits and filings. Wipe clean with a solvent-dampened rag.
Prep the Surface Use a mill-bastard file and/or an abrasive Scotch-Brite pad to deburr the cut edges of the outboard or sterndrive’s skeg stub. Use a stiff-wire brush to clean off metal bits and filings. Wipe clean with a solvent-dampened rag.

Dry Fit Using a plastic or wooden mallet, or tapping with a hammer and a scrap of wood, tap the SkegGuard into place over the old skeg and check everything for a proper fit. Tap it firm enough to make sure it is well-seated on the stub of the original skeg.
Dry Fit Using a plastic or wooden mallet, or tapping with a hammer and a scrap of wood, tap the SkegGuard into place over the old skeg and check everything for a proper fit. Tap it firm enough to make sure it is well-seated on the stub of the original skeg.

Drill Holes Using the SkegGuard with its pre-drilled holes as a template, drill two 1/4-inch holes completely through the skeg. Be sure to drill straight and square. A high-speed steel (HSS) bit will work, but I used a Cobalt bit, which dissipates heat better. Insert Bolts The SkegGuard comes supplied with bolts in various lengths to accommodate varying thicknesses of skegs. Locking sealer is pre-applied to keep the bolts from loosening. Insert the appropriate bolt and use the supplied hex tool to tighten.
Posted by Capt. Rex Alan