Midwinter Outboard Winterization?
Think you've done everything necessary for your engine? Read on to find out.
By January, most boats have been put away for the winter, but if you’ve committed any of these five faux pas, there’s still time to correct them before your mechanic has to fix them in spring.

1. When you changed oil in your four-stroke, did you put a new drain screw gasket on the drain plug? Most have a compressible copper gasket. Be judicious in tightening the plug. It’s steel going into aluminum, so Superman strength will strip the threads, but a whole lot less torque will calm the waters with oil.
The net result, since mechanics don’t take first-born as payments, is a big hit to the Visa card.
2. There’s no question in my mind you changed lower unit gear oil. When you had the drain screws out, it’s probable that one came out with a gasket on it and one didn’t. It’s probable you didn’t notice and can’t see the gasket in one of the holes, so without replacing both gaskets — the proper way — you run the screws back in. Now one screw has two gaskets and the other has no gasket. This “new math” allows the oil to disperse on the pristine waters as the gear oil warms and expands, and suck water in as the gearcase cools. The easy thing to do is remove the upper drain screw and see how many gaskets are on it and in the hole. Only one? Breathe a sigh of relief. Two? You know what to do.
3. An inboard/outboard has become a nemesis as folks encourage manufacturers to create “out of sight, out of mind” rigs. The engine is inaccessible. If you can get to the recirculation hoses (assuming raw-water cooling), you can drain most of the block water. But what about the “cool can,” exhaust riser and power steering cooling? It’s not too late. (I hope!) Go to any reputable marine dealer and get a winterization rig that allows you to run the engine on flush-muffs until it’s warm. Then flip a lever and the engine pulls non-toxic antifreeze (three to five gallons) from a big bucket you just bought. When prop-exhaust discharge comes out pink like antifreeze, let it run until your supply is exhausted, shut the engine off, recheck the hose connections and you’re done. If your engine is freshwater cooled, all you need to do is check the antifreeze for its protection level — it’s already protecting the things you can’t see or don’t think about.
4. Steering resistance only increases over the winter. If your mechanical steering was tight in the fall, it’ll be impossible to move in the spring, and what happens following launch is fodder for many an observer’s story. The tilt tube on many engines — where the mechanical steering ram goes through — still isn’t stainless, while the ram is. The tube “grows” rust, which the ram tries to scrape off. There comes a point when it’s scraped as much as it can and the rust that’s growing clamps down on the ram. Grease will help, but not retroactively.
If you want to get your boat dirty without a tech ever touching it, remove the steering arm from the ram. Remove the big nut from the cable where it attaches to the tube. Remove the ram from the tube and use a household radiator brush to clean the tube’s insides. On the front of the engine will be two grease fittings, often mistaken for steering fittings. They’re tilt fittings. Remove the fitting on the right where the ram exits. Using a drill bit smaller than the threaded hole, drill into the tilt tube and clean up the metal bits. Reinstall the grease fitting and check that when you hook up your grease gun, grease squirts into the tube. Voila! Now your engine is just like the new ones, and the steering is free again. Reassemble it the way you disassembled it. Then give the steering fitting halfway down the vertical midsection a little shot of joy.
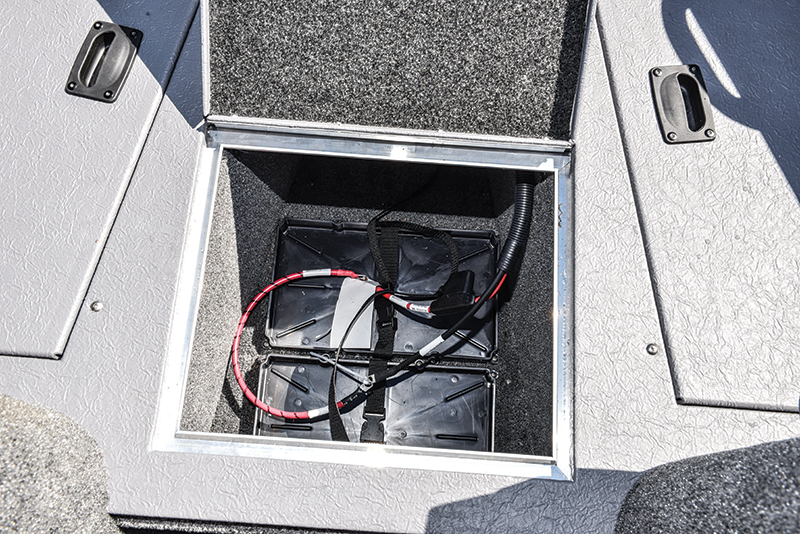
5. Did you remove the boat’s batteries for the winter and leave them charging in the garage? Did you just remove battery cables willy-nilly and let them fall into the bilge without tie-strapping groups? I get an easy half-dozen calls a year asking me to replace the starter on a customer’s engine when all that happened was the owner failed to notice one big, black ground cable lying in the bilge behind the batteries. Take this time to climb under the boat cover with your flashlight, locate all the wires and cables, and tie-strap POS and NEG for both batteries separately. Since it’s easy to use a phone as a camera, why not take a picture of the number of cables coming to each battery, then print the pics and use them to ensure you have the right number of cables on the proper battery when you reinstall the batteries?
Posted by Dr. David Bruce Banner