How to Winterize Your Outboard for Ice Season
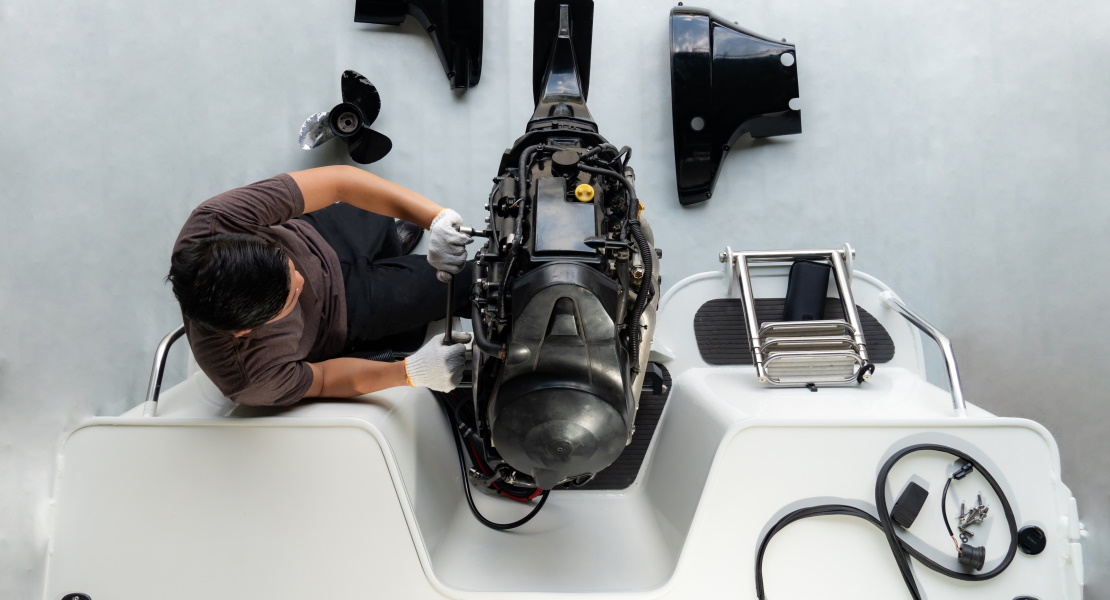
With Ice Fishing season drawing close boaters turn to the task of laying up their boats for the winter. This article covers how to protect an outboard motor against corrosion and freeze-related damage during winter storage.
The process, referred to as “winterization”, consists of some simple tasks that are easily performed by most owners of an outboard-powered boat.
Fishbrain's guide to ice fishing
Winterizing an outboard is an essential process for protecting engines stored in climates that experience freezing temperatures.
In fact, winterizing is recommended for all outboard engines that remain unused for months.
Think of winterization as "extended storage protection". A motor that isn't winterized can quickly deteriorate, inside and out. Stale fuel, old engine oil, and unflushed deposits can easily damage your outboard if not dealt with before a long period of inactivity.
You can pay a local marina or boat mechanic to winterize your outboard motor, but it won't be cheap.
The sensible alternative is to do it yourself!
Winterizing can be done with a handful of fluids and lubes, and without any special tools.
Start by consulting the engines owners manual and collecting the tools and maintenance products you’ll need.
To accomplish these tasks, you will need the following items:
- Gallon of antifreeze
- Engine winterizing kit
- Fuel Filter
- Fuel Stabilizer
- Gear lube oil
- Gear lube pump
- Outboard motor oil (Four-stroke motors)
- Oil filter (Four-stroke motors)
- Oil filter wrench (Sometimes needed)
- Drain pan to catch motor oil or gear lube oil
- Absorbent “shop” rags
- Fogging oil
- Grease gun loaded with a cartridge of grease
- Spark Plugs
- Rust Inhibitor Spray
- Basic Hand Tools
- Motor Flushing Muff and Garden Hose
- Prop Wrench or Appropriate Socket
- Funnel
- Waste Oil Container
Safety First!
Winterizing outboard motors can expose you to some hazardous substances. Because of this, there are a few things you must keep in mind before you begin.
NEVER run outboard motors in a garage or other enclosed space. (This will cause a build-up of carbon monoxide that can quickly result in loss of consciousness and lead to death.)
ALWAYS stop the engine and allow it to cool before handling fuel. Gasoline is extremely flammable and combustible. Keep fuel away from heat, sparks or flame.
ALWAYS properly dispose of any unused gasoline, engine oil, or gear oil according to the laws and regulations in your area.
The process, referred to as “winterization”, consists of some simple tasks that are easily performed by most owners of an outboard-powered boat.
These tasks include:
- Drain the crankcase oil (Four-stroke motors)
- Install a new oil filter (Four-stroke motors)
- Install a new fuel filter (Four-stroke motors)
- Filling the crankcase with new oil (Four-stroke motors)
- Changing the lower unit gear oil
- Stabilizing the fuel
- Flush with antifreeze & fog the cylinders
- Protecting against corrosion
- Grease tilt & pivot tubes
- Check the Power Trim Fluid
- Drain the Crankcase Oil (Four-Stroke Motors)
- Check Sacrificial Anodes
Drain the crankcase oil (Four-stroke motors)
The reason you need to change the crankcase oil is because contaminants in “dirty” oil can corrode and shorten the life of engine parts during winter storage. Before beginning the oil change process, attach a set of flushing muffs to a garden hose and place them squarely over both sides of the water intake for your motor.
Then turn on the water, start the motor and allow it to run a few minutes to warm up the oil. Then, turn off the motor and remove the flushing muffs. Most four-stroke outboards have an oil sump drain plug located below the crankcase at the back or side of the motor’s leg. Unfortunately, changing outboard oil can be a bit messy.
While some mechanics opt to remove the oil by sucking it out via the dipstick tube, this process does not get all the oil out. So we suggest you follow the manufacturer’s instructions for how to drain the oil and change the oil filter.
(Note: Before removing the oil drain plug, be sure to position a catch pan under the motor to catch the oil as it drains out!)
When shopping for outboard motor oil, make sure that the oil you select meets or exceeds the manufacturer's specifications in your owner's manual. In some cases, the oil drain plug gasket may need to be replaced.
Follow the manufacturer’s recommendations in this regard. When finished, some cleanup will be necessary—so make sure you have some rags on hand.
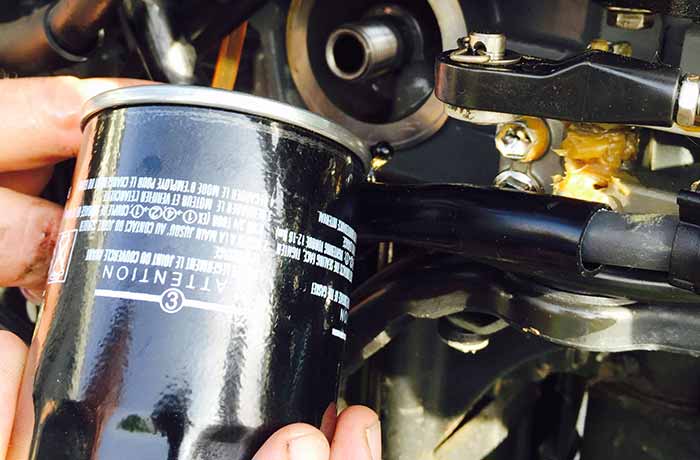
Change the Oil Filter (Four-Stroke Motors)
After draining the oil, remove the oil filter. Most of these are of the spin-on type, similar to those on automobile engines. Sometimes, filters that have “taken a set” might require an oil filter wrench for removal. The new filter should be an OEM or equivalent model. Before installing the new filter, lightly coat the O-ring on the filter with motor oil and then screw it on until it is hand tight.
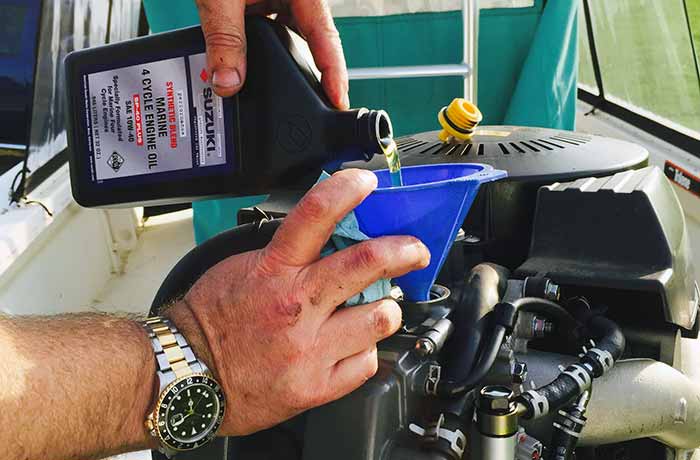
Fill the Crankcase with New Oil (Four-Stroke Motors)
After installing the new oil filter, fill the crankcase with new oil. Check your owner’s manual for the viscosity and quantity you need. Make sure the API service level meets or exceeds what the manual specifies as well.
Change the Fuel Filter
Now is a good time to change the OEM fuel filter located on the motor. Follow your owner’s manual in this regard.
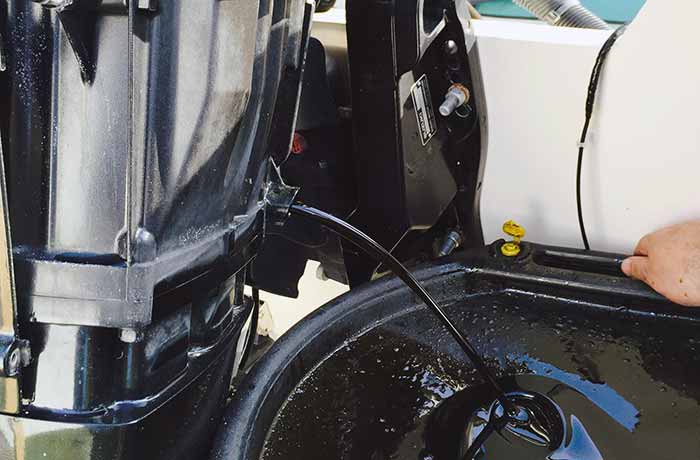
Change the Gearcase Gear Oil
Before beginning, check your owner’s manual for the viscosity and quantity of gear oil that your outboard requires. Most 80/90 weight gear oil will work just fine.
The gearcase or lower unit (located directly forward of the prop) will have a stainless steel, screw-type drain plug at the bottom and a stainless steel screw-type vent plug somewhere above it.
To start the process, place your catch pan under the gear box and then remove the bottom plug. Be careful to remove the gasket along with the plug.
(Note: Many drain plugs include a magnetic prong to which some metal particles may be attached. If there are small fine particles there is no need to freak out! This is normal and indicates normal gear wear, but coarse metal chips indicate excessive wear. If in doubt, consult with a service professional.)

Once the bottom plug is removed, a small amount of gear oil will begin to drip out. Next, remove the vent plug at the top. Once the top plug is removed, the gear oil should freely flow out the bottom drain hole. As the oil drains out, observe its color and clarity.
Gear oil in good condition should be translucent with a greenish cast, whereas a milky appearance indicates that water has made its way into gear box.
If this is the case, seek the advice of a service professional.
New gear oil is always pumped upward from the bottom hole until it overflows at the top. The reason it is filled from the bottom up is to eliminate the possibility of trapped air and ensure that the entire gearcase casing fills with oil.
There are two ways to pump in the oil. For very small outboards, one way is to press the nozzle of a tube of gear oil into the bottom hole and to slowly squeeze the gear oil into the casing until it overflows out the top hole.
For larger outboards, the other way is to use a gear oil pump. In either case, when the oil overflows out the top hole, replace the top plug, then remove the pump nozzle from the drain hole and quickly replace the plug. Make sure you don’t forget the gaskets!
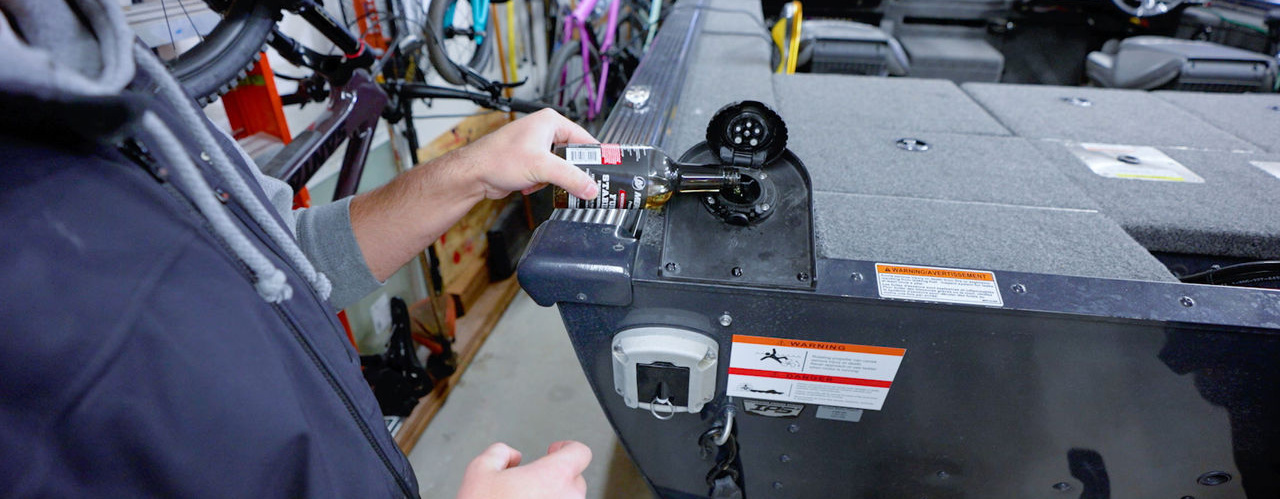
Stabilize the Fuel
Stabilizing the fuel with products such as StarBrite’s STA-BIL Ethanol Treatment for Gasoline will help to prevent the formation of gum and varnish that can form during winter storage.
Follow the manufacturer’s instructions for mixing one of these products at the correct ratio into your outboard engines fuel tank.
Next, you need to circulate the stabilized fuel through the entire fuel system. To do this, reattach the flushing muffs, turn on the water, restart the motor and allow it to run for five to ten minutes and then shut it off.
Fog the cylinders while flushing the motor with antifreeze.
To prevent freeze damage, prior to winter storage, many owners simply drain the cooling water out of their outboards. However, while it might seem like “overkill”, we recommend flushing your motor with antifreeze. This will prevent residual water from turning into ice and causing damage during a hard freeze.
Dosing your motors cylinders with fogging oil prior to winter storage will prevent the formation of rust within the cylinders—which obviously is a good thing!
Fogging the cylinders and flushing your outboard with antifreeze can be combined into a single procedure. For two- and four-stroke carbureted motors, after running the motor for five to ten minutes (per the instruction above), shut off the motor, disconnect the garden hose and hook up the winterizing kit to the flushing muffs. Then fill the winterizing kit tank with antifreeze, which should be of the non-toxic propylene glycol variety.
Next, remove the cowling (hood) to gain access to the air intakes on the front of the engine.
Next, after opening the valve to the winterizing kit, restart the motor and watch the antifreeze level drop in the tank. You should begin to see antifreeze discharging via the “telltale” of water that exits the motor.
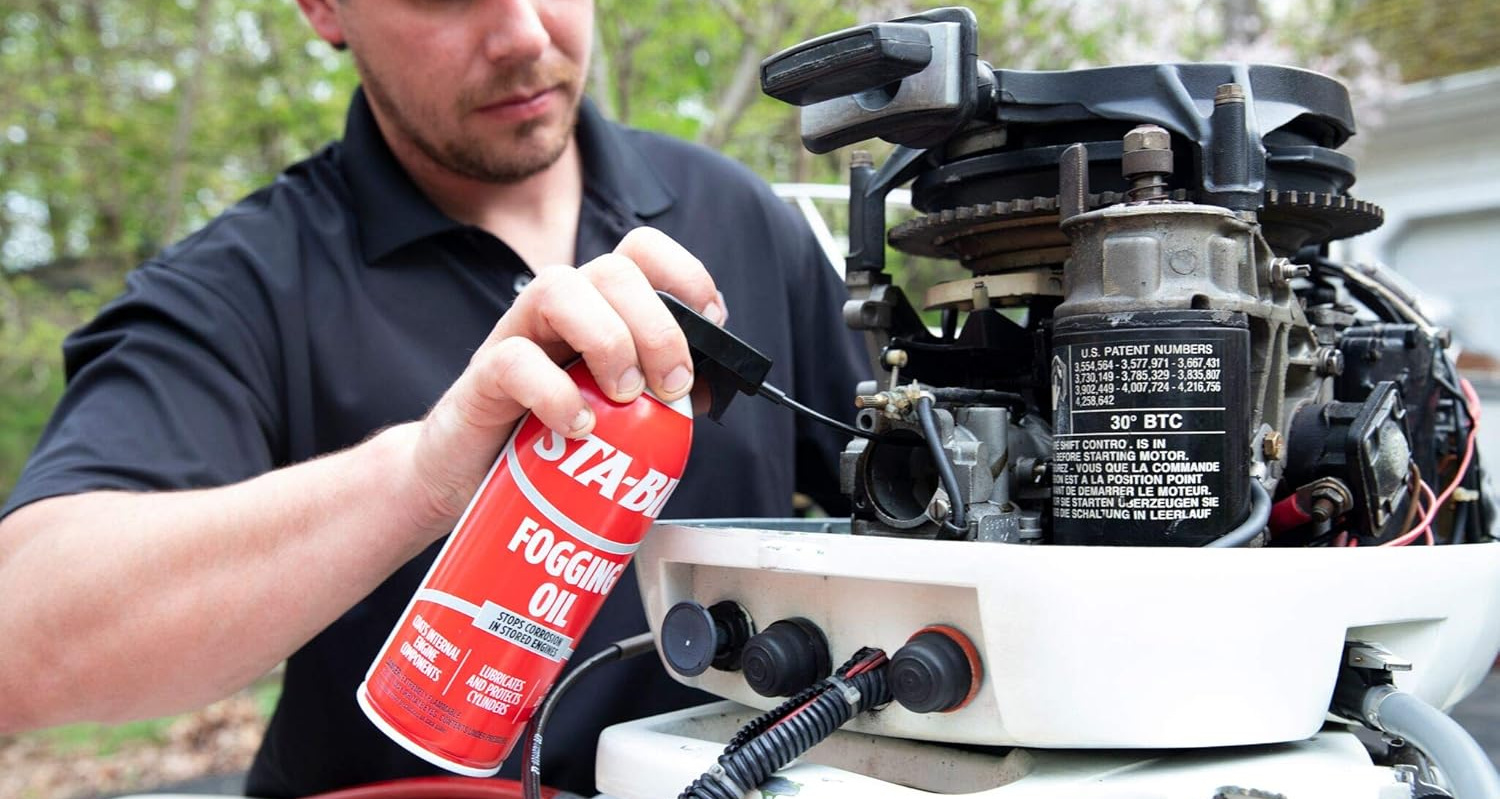
While the engine is running, begin to spray fogging oil into the carburetor(s). This will usually cause lower-horsepower engines to stall, while higher horsepower engines may cough and sputter, but continue running while emitting white smoke.
Spray a good amount of fogging oil through the intake and then disconnect the fuel line from the engine, and continue spraying fogging oil into the engine until the engine dies.
Usually the motor will run rough and emit white smoke just before it dies. Running the motor until it burns up all of the fuel from the carburetors prevents the formation of varnish deposits from gasoline that would otherwise remain in the carburetor bowl during winter storage.
Fogging Procedure for Outboards with Electronic Fuel Ignition
Just like with the procedure described above, you can fog your EFI motor and at the same time winterize its cooling system with antifreeze. However, the procedure for fogging an EFI-type motor is different—and also little easier compared to carbureted motors.
Instead of spraying fogging oil into the cylinders through the carburetor(s) you will need to run the fogging oil directly through the fuel system. This is commonly done by running a fuel line from the motor to a small container of stabilized gasoline into which fogging oil formulated for EFI motors has been mixed.
Consult your owner’s manual for the correct fogging oil to use.
Note: Do not use fogging oil formulated for carbureted motors, as it contains a wax-like substance that can clog the fuel injectors of an EFI motor!
Unlike the procedure for carbureted motors, you should not cut off the fuel supply to the motor and then wait for it to stop. Instead, run the motor until you see white smoke exiting from the exhaust and then, before the winterizing kit runs dry, shut the motor off.
Note: Running an EFI motor until it quits due to a lack of fuel can damage the fuel system
Check the Power Trim Fluid
Check your owner’s manual for specific instructions for your outboard model.

You will probably need to tilt the engine all the way up to get to the pump. The fluid inside should be bright red; if so, check the level and top it off if it is low. Trim fluid that is pink or milky indicates the presence of water, which means there may be a leak somewhere in the system, and the trim pump should be inspected by a qualified dealer.
Watch "Quick Tip: How to Check Your Outboard Power Trim Fluid"
Check Sacrificial Anodes
Sacrificial anodes (or zincs, as they are often called) are designed to protect the motor’s other submerged metals from galvanic corrosion. Most outboard motors have several sacrificial anodes, and they can be located by consulting the owner’s manual. Sacrificial anodes should be replaced when they are 50 percent deteriorated.
Final Tasks
For oil-injected two-stroke motors, completely fill the two-stroke oil tank so that water won’t condense inside the tank and contaminate the oil supply.
Locate the zerk fittings for the pivot tube and the tilt tube and with a grease gun squeeze in some fresh grease.
Next, spray a corrosion inhibitor on to the power head and replace the cowl.
Finally, remove the propeller and inspect it for damage.
After removing the prop, check the prop shaft for fishing line. Remove the large thrust washer that is located behind the prop on some hub styles. The fishing line is often coated with grease and hard to see. Use a sharp pick or a small screwdriver to pull at the area around the propshaft seal to loosen any line that may be present.
Over time, the forward thrust of the propeller presses the line into the rubber propshaft seal. If the seal is damaged, water can enter the gearcase and cause significant damage.
Lubricate the shaft with grease and reinstall the prop, or leave it off to discourage theft.
If you propeller is nicked or bent, the off-season is a good time to send it out for repair at a propeller shop so it will be ready to go in the spring.
Then, store the engine in an upright position. Whether the boat is stored on a trailer or a rack, the motor should be trimmed down to its vertical position so that any water remaining in the engine can self-drain. If water trapped in the engine freezes, it could cause serious damage. In some situations, mice can be a problem – they may be able to get under the motor cowl and chew on wiring.
Some dealers swear by this tactic: Fabric softener sheets, or drier sheets, are believed to repel mice. Just don’t forget to remove the sheet before you hit the water next season.
Check and Maintain the Battery
If it’s a lead-acid battery, inspect the fluid level and add distilled water, if needed. Be sure the battery is fully charged, remove it from the boat, and store it in a cool, dry place. Storing the battery on a maintenance charger will keep it charged and fresh until spring.
With the off-season storage procedure complete, your outboard will be protected for months. Come spring, getting back on the water will be a snap. Just reinstall the boat battery if it was removed, reinstall the prop, and turn the key. You should be ready for another season of fun and adventure on the water.
Keep a Winterization Supplies List
See your outboard owner’s manual for guidance on supplies and tools specific to your motor.
Print off this handy checklist for your winterization.
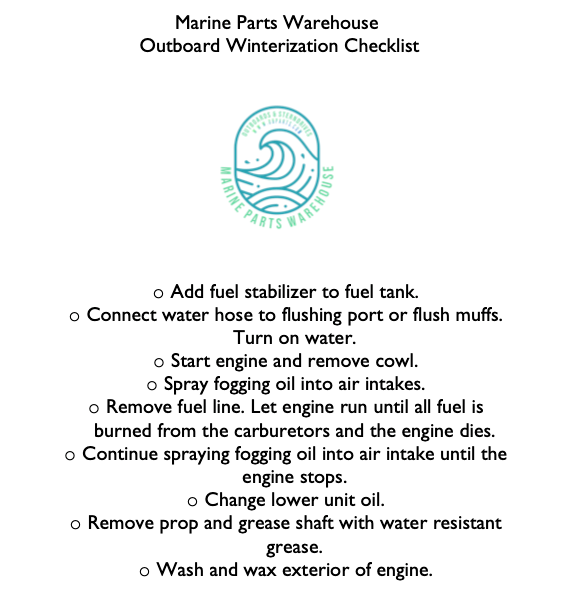
Winterization Supplies List
See your outboard owner’s manual for guidance on supplies and tools specific to your motor.
- Engine Oil
- Engine Oil Filter
- Fuel Filter
- Fuel Stabilizer
- Spark Plugs
- Marine Grease
- Fogging Oil
- Gear Lube and Pump
- Rust Inhibitor Spray
- Basic Hand Tools
- Grease Gun
- Spark Plug Gap Tool
- Motor Flushing Muff and Garden Hose
- Prop Wrench or Appropriate Socket
- Funnel Waste Oil Container
Posted by Art Vandelay