How to Replace an Outboard Water Pump
How to Replace an Outboard Water Pump
Don't be put off by the fact that you have to drop the lower unit! Marine Parts Warehouse has the tips to get you through the job.
The water pump is a vital component of any outboard motor because it circulates cooling water through the powerhead. The rubber water pump impeller requires regular maintenance. As the impeller wears, the flow of water to the powerhead can be diminished.
If the impeller fails, the engine will quickly overheat. Possibly causing powerhead failure leading to a powerhead rebuild.
Depending on the outboard model, your owner’s manual will recommend changing the impeller annually, at 100 hours or at 300 hours. But time is not the only factor to consider when regarding impeller life.
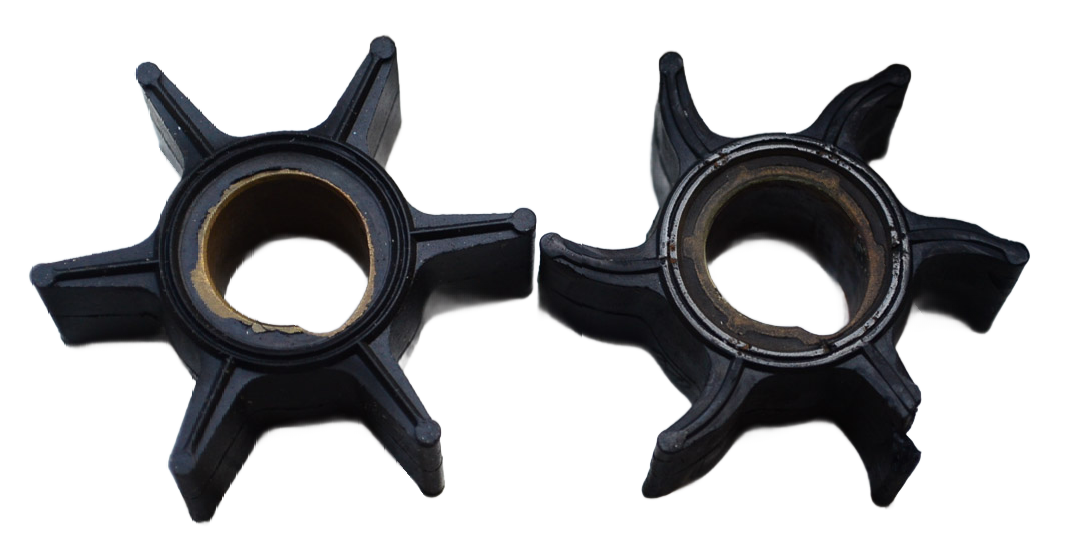
Note - The new impeller on the left compared to a used worn out impeller on the right.
If you regularly use the motor in silty or sandy water or if you happen to run aground on a sandy bottom, abrasive material drawn through the pump can accelerate wear and changing the impeller will be good insurance against failure. A weak flow of water from the cooling water telltale is a sign the impeller may be worn and no longer pumping efficiently.
NOTE - If you are reviving an old motor or an outboard that has not been used in several seasons, change the impeller before starting the motor. There’s a good chance the impeller has grown dry or stiff and taken a “set” and will either disintegrate on start up or no longer pump efficiently.
Changing the impeller does not require special tools, but it can be a moderately challenging job. It requires removal of the lower unit from the outboard and a stand or bench area to hold the lower unit while the water pump is disassembled. Having help to remove and reinstall the lower unit can make the job easier.
How Does an Outboard Water Pump Work?
Outboard water pumps are simple designs. Located just atop the lower gearcase assembly, they're easy to access and service, too. The pump houses a rubber impeller that's keyed to the engine driveshaft. Water enters the lower gearcase through inlets on the sides of the gearcase, just above the propeller shaft area. The driveshaft turns the pump inside a plastic housing with a stainless steel liner.
The pump draws water through the intakes and up into the housing. The impeller blades (vanes) touch the liner at lower speeds as the driveshaft turns, but as the engine revs up, the impeller blades bend back away from the housing liner. The pump sends water out of the top of the housing through a brass tube, typically about a half-inch in diameter, up to the engine's powerhead, where it circulates through the system's cooling passages.
Salt, sand, mud, sticks, and other debris take their toll on the pump impeller, housing, and related parts. That's why most outboard technicians recommend replacement every season, or at worst every other season. There are legions of stories that go "I've had my outboard for twenty years and never replaced the water pump"; however, good preventative maintenance practice includes replacement of the pump and housing at regular intervals.
1. Remove the Lower Unit (Gear Case)
- Begin by removing the outboard's sacrificial anode.
- Next, disconnect the shift rod. The tricky part of the gearcase removal on some outboards is disconnecting the shift shaft. For example, on most Mercurys the engine must be shifted into forward gear first.
- On many Johnson/Evinrude outboards, the service manual specifically denotes which gear the engine should be in to make removal and re-installation easier. Temporarily removing the shift cable at the engine end will make things much easier as well, especially on engines where the shift shaft disconnection is inside the cowling. The engine should be tilted all the way up for gearcase removal.
- Remove the gearcase mounting bolts. Don't forget the bolt located under the trim tab. Mark the position of the trim tab before removing it so you can correctly position it for reinstallation. If you don't, you will have to re-adjust it after water testing the rig, so it will steer neutrally and won't pull to port or starboard
- Use a rubber mallet to gently tap on the gear case to separate it from the rest of the outboard to avoid damage to the anti-ventilation plate. Before you completely remove that last bolt or nut, prepare yourself to catch the gearcase in case it drops right out. Typically this won't happen; it will usually require some wiggling and pulling to remove it, even with all the bolts/nuts out.
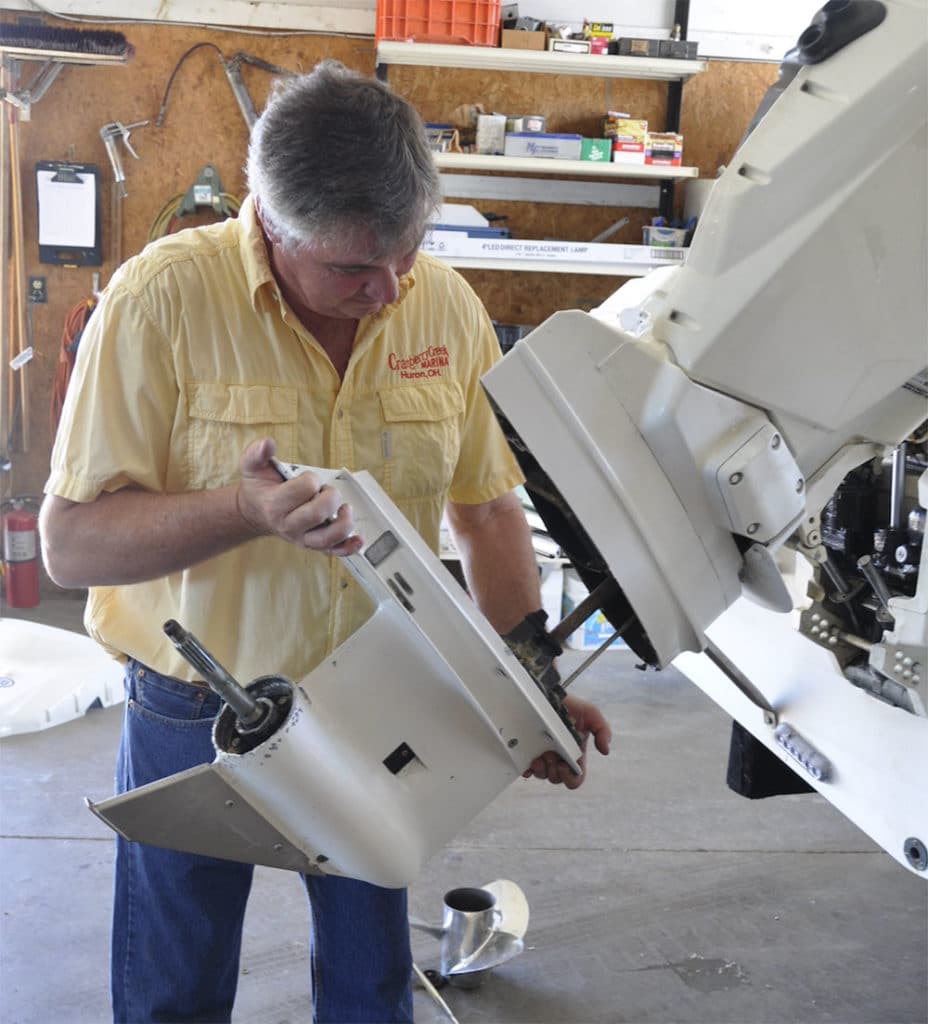
Removing the damaged lower unit.
- Disconnect the speedo tube using needle-nose pliers. Use a pinch-and-roll method to remove the tube slowly.
- Place the lower unit in a suitable workspace to access the rest of the steps in the process.
2. Remove the Water Pump Assembly
The water pump is ready to be removed, using a fitting socket on the four mounting bolts. Now is also a good time drain of old gear oil out while completing the water pump job.
3. Remove the Water Pump Housing
Next, remove the four bolts that hold the water pump assembly in place. Gently pry off the housing. Take note of the condition of the seals for potential replacement.
4. Replace the Water Pump Impeller
- Use a water pump repair kit suitable for your outboard motor.
- Remove the old plates and gaskets at the base of the impeller.
- Position the new plates and gaskets using the old ones as a reference for direction and alignment.
- Install the new impeller.
- Line up the new impeller according to the old one’s orientation. The impeller is pushed into the housing liner with a slight clockwise twists.
- Apply grease to the bolts for easier removal in the future.
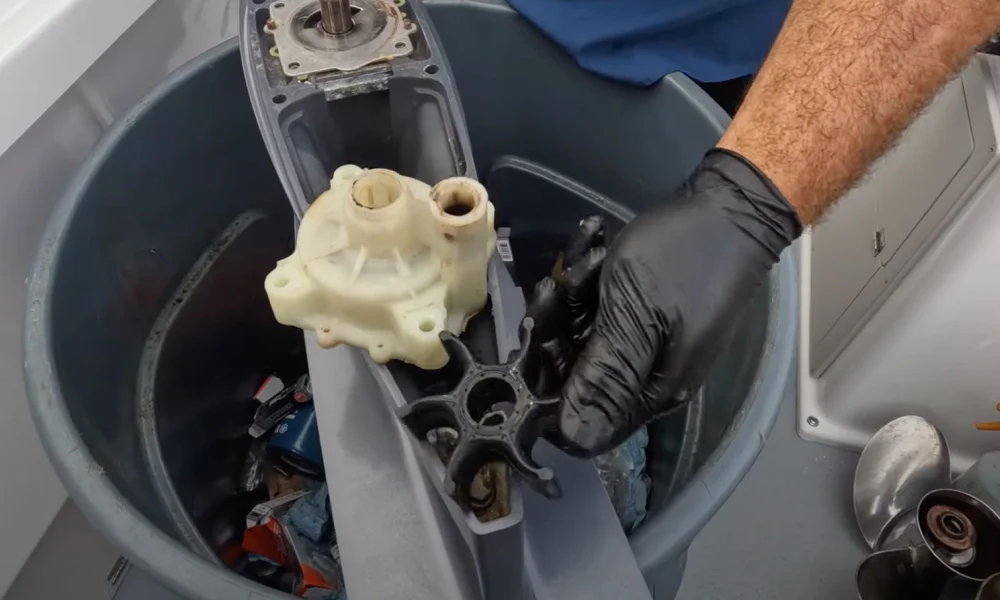
Installing the new water pump impeller
5. Reassemble the Water Pump Housing
- Reattach the housing.
- Rotate the driveshaft clockwise to ensure the impeller blades correctly orient within the housing. Align the holes with the bolts.
- Gradually tighten the bolts, following torque specifications. Set torque to light setting or hand tighten them with a wrench. Be careful not to overtighten.
- Remember to reinstall the collar washer to prevent water leakage.
6. Reinstall the Lower Unit
Note - Remember that the gearcase must be in the correct gear before installation.
- Prepare the gear case studs by cleaning them first before applying grease to them.
- Clean the top of the drive shaft, then dab a small amount of marine grease on the splines — NOT on the top. Greasing the top may prevent the shaft from seating properly inside the crankshaft. Greasing the splines will make removal of the gearcase next time easier.
- Carefully maneuver the gear case back into position, aligning the drive shaft first, then the shift shaft. You may have to have someone slightly turn the flywheel to get the driveshaft splines to align.
- Be sure the exhaust adapter is properly positioned in the midsection.
- While sliding the unit up into the midsection, ensure that the drive shaft, shift shaft, and water tube are positioned properly. Be especially careful that the water tube enters the top of the water pump properly; if it misses, the engine will not receive cooling water and will overheat.
- You may have to remove the side cowling to allow easier access to the shift shaft.
- Reconnect the speedo tube using needle nose pliers.
After the installation is complete and you've reconnected the shift shaft and shift cable, start the engine and ensure that it is pumping water, running properly at the proper temperature, and shifting correctly. Consider also servicing the engine's thermostats at this time, so that the entire cooling system is refreshed and ready for service.
Changing an outboard water pump impeller is a crucial maintenance task that ensures your outboard motor’s longevity and optimal performance. By following the step-by-step instructions in this guide, you can confidently tackle this task and easily replace the impeller saving you money.
Remember to gather the necessary tools, pay attention to safety precautions, and take your time to remove the old impeller and install the new one carefully.
Regularly inspecting and replacing the water pump impeller will help prevent overheating issues, maintain proper water flow, and ultimately prolong the life of your outboard motor.
**Important Note** Always consult your engine’s owner’s manual for instructions and information specific to your engine.
If you need clarification on which water pump impeller your outboard engine needs, just let us know!
Posted by Ricardo Tubbs